How to set it up
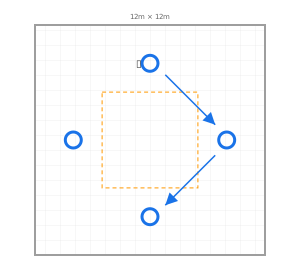
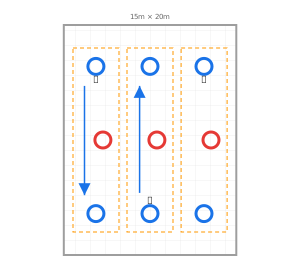
- Mark an 8 by 8 metre square with a cone in each corner; bigger for younger players.
- Three attackers on three sides of the square, one defender inside.
- One ball. Run several squares side by side for bigger groups.
How to play
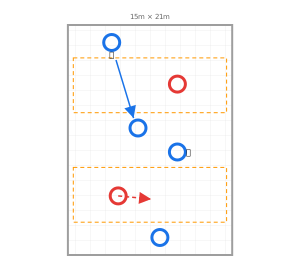
- The three attackers keep the ball from the defender, passing along the outside of the square.
- After each pass, the two players without the ball move to the cones on either side of the new ball carrier, so there is always a pass to the left and to the right.
- The defender stays inside the square. When the defender wins the ball, they swap with the player who lost it.
- Count the passes: ten in a row scores a point for the attackers; one more round of defending for the defender.
Why it works
The cones give a simple answer to a hard question: where should I stand to help? Always beside the passer, never behind the defender.
Once the habit is there, the cones can go, and the players keep finding the same angles on their own.
What to coach
- Move before the ball arrives, not after.
- Receive with the foot furthest from the defender, body open to the next pass.
- Use the first touch to set up the second.
- A fake pass shifts the defender and opens the other side.
Questions to ask
- "Why do you move to the side cones and not behind the defender?"
- "When you received, could you already see your next pass?"
- "What made the defender win the ball?"
Make it easier, make it harder
- Easier: a bigger square, unlimited touches, the defender can only intercept, not tackle.
- Harder: two touches, then one; a smaller square; take the cones away and keep the same rule.
How to adapt it by age
- U9 to U10: a 10 by 10 square, two touches, counting to ten.
- U11 to U12: 8 by 8, two-touch then one-touch rounds.
- U13 to U14: 4v1 or 5v2 in a bigger square, one touch, and a point for a pass that splits two defenders.
Put it in a session
Hobbit plans the whole practice around this game for your age group, numbers and space, with a diagram for every block.